In some scenarios you might find yourself having to perform an IP address changing to your appliance. This operation could be dangerous and cause disservice if not done with proper care.
In this How To is explained how to perform a risk-free appliance IP address migration.
[fruitful_alert type="alert-info"]Note: If the destination VM is a Libraesva cloud one is required to contact support here.[/fruitful_alert]
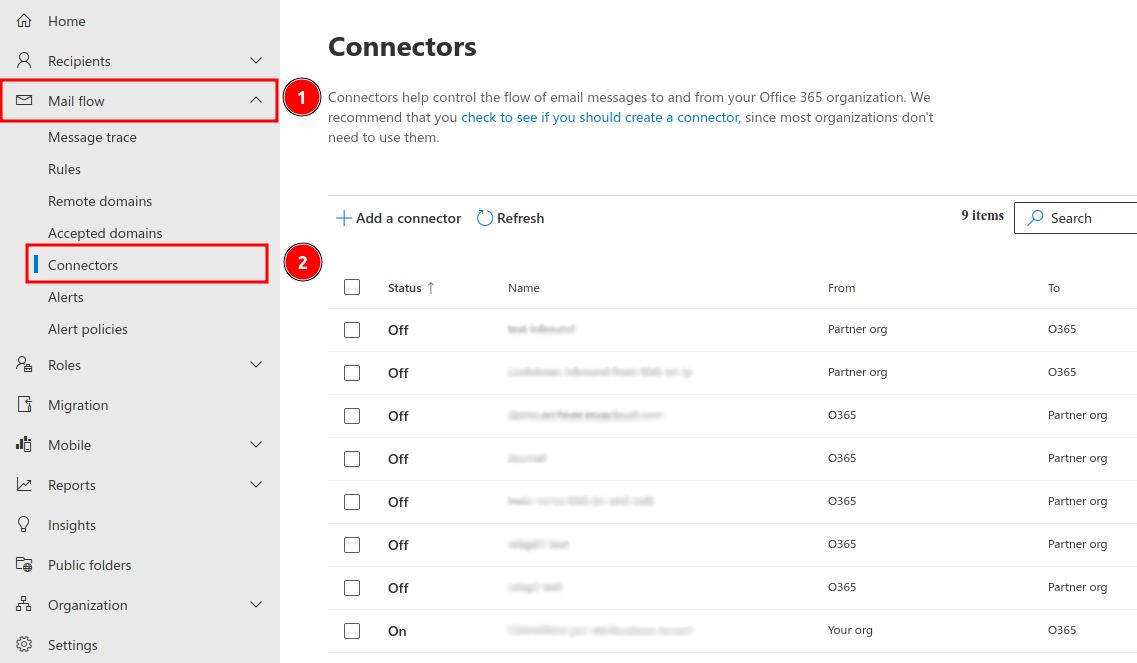 Edit the ESG incoming connector by selecting it and clicking on the Edit sent email identity as shown in the screenshot below.
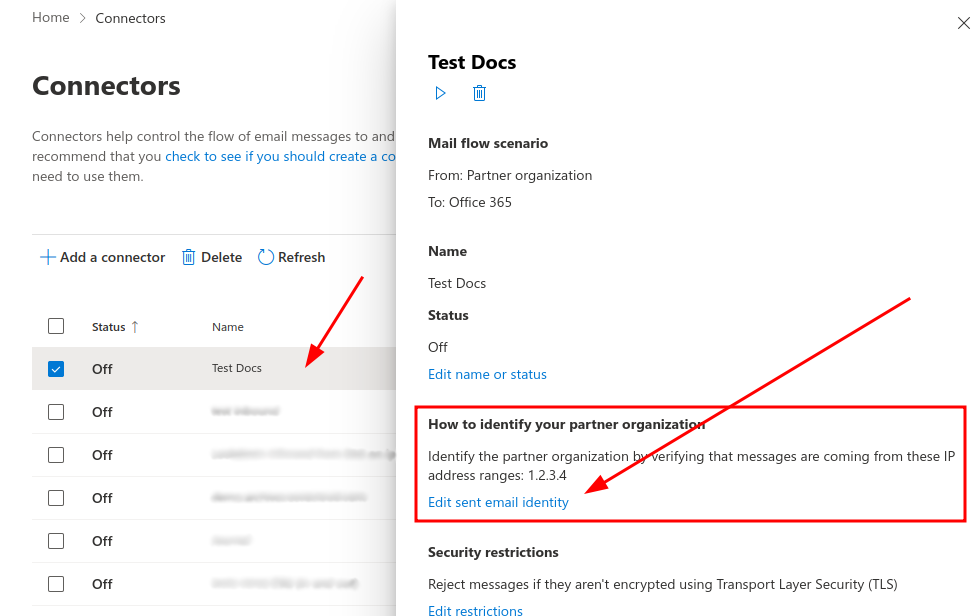 Type the new appliance IP address in the field and click on the [+] button and click on Save at the bottom right of the page.
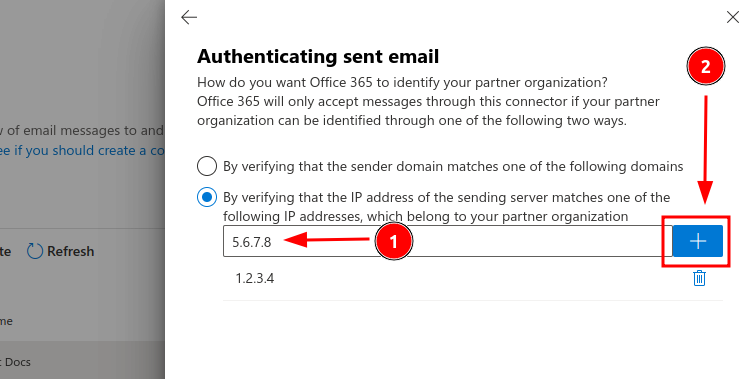
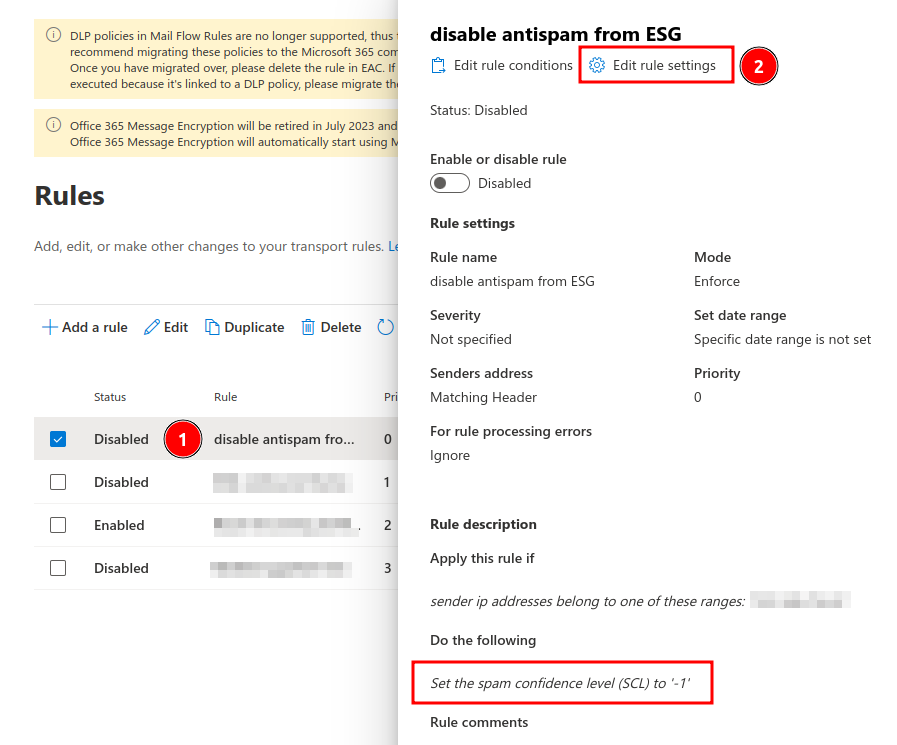
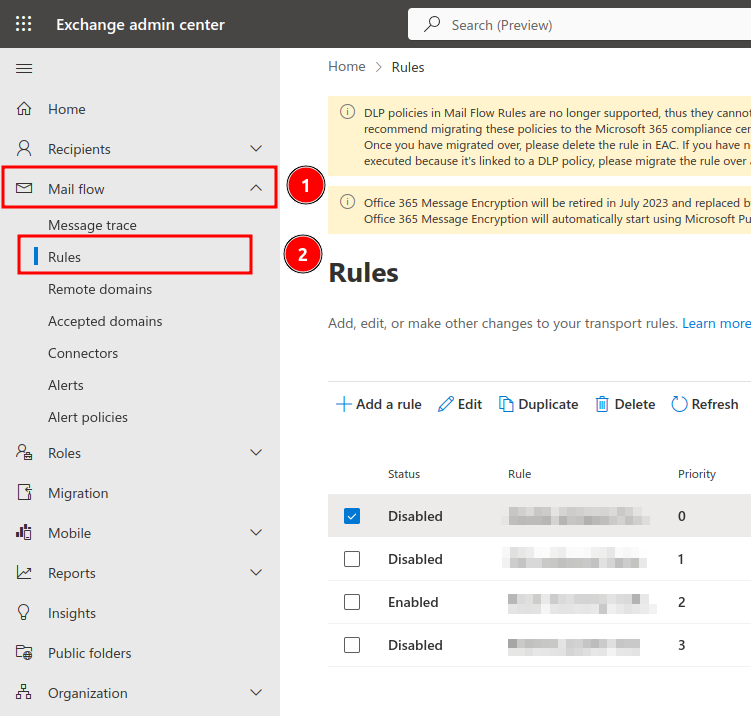 Select the rule having the "Do the following" parameter set to "Set the spam confidence level (SCL) to '-1'". Edit the rule by clicking on the "Edit rule settings" button.
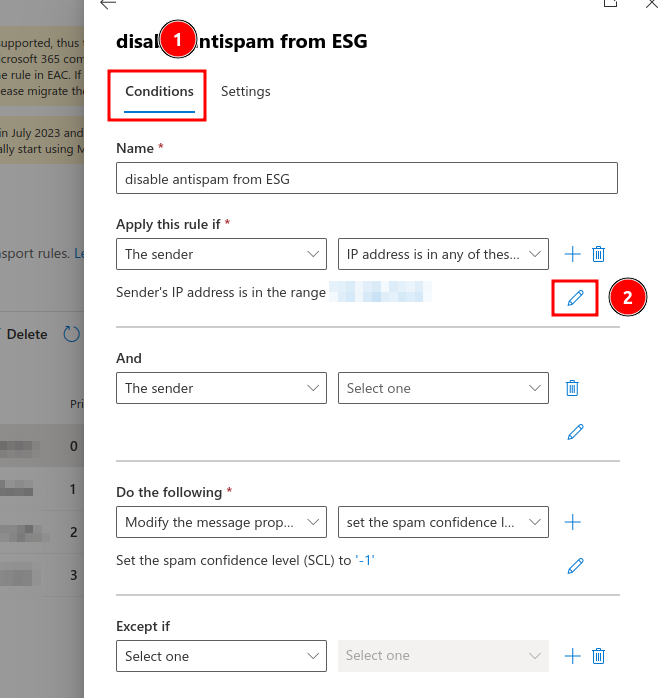
 Switch to the Conditions tab and click on the pencil icon in the "Apply this rule if" section.
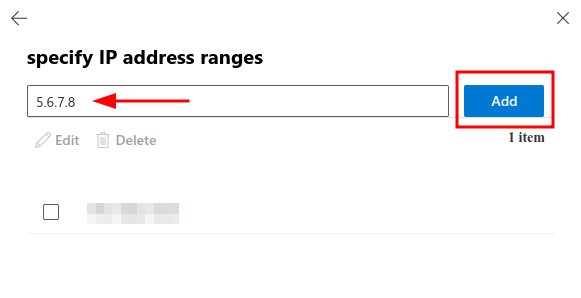
 Type the new IP address in the field and click on the Add blue button. Click on the Save button at the bottom right of the page to confirm the rule update.
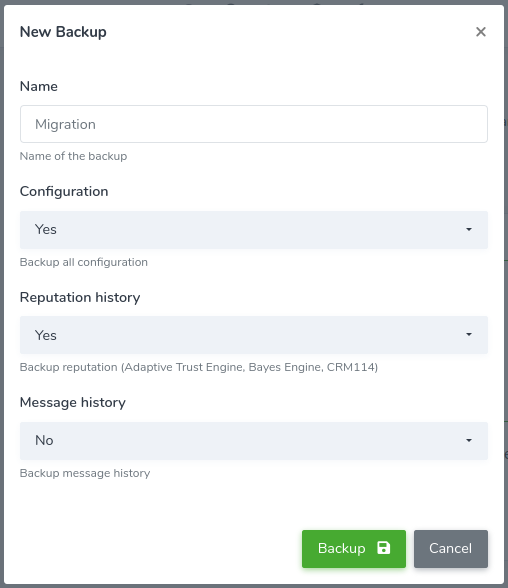
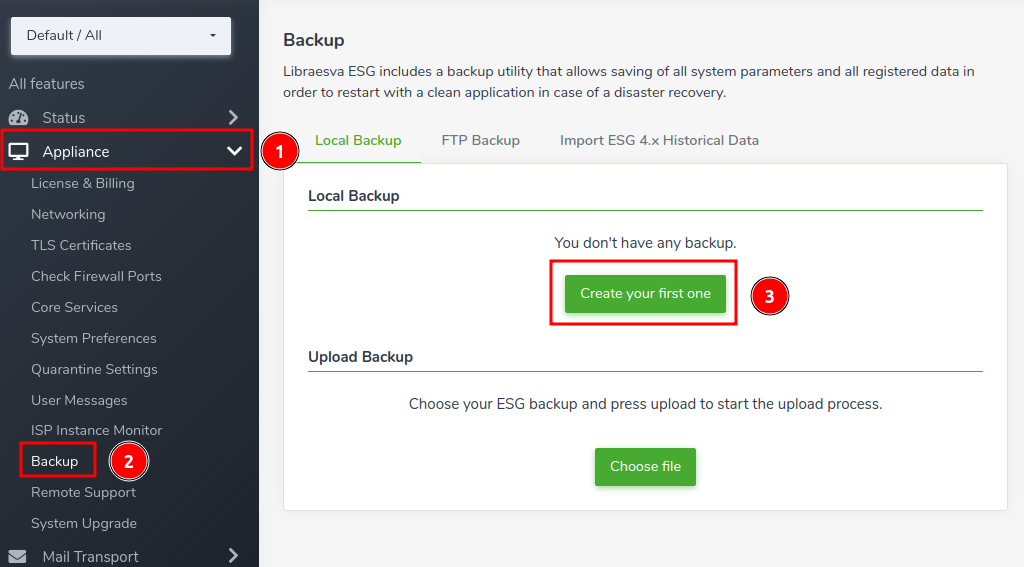 The backup must include the Configuration and the Reputation history as shown in the screenshot below.
The Message history backup is not required for a successful migration and you can create and restore this backup later.
When you are ready, click on the Backup green button to start the backup procedure.
The backup must include the Configuration and the Reputation history as shown in the screenshot below.
The Message history backup is not required for a successful migration and you can create and restore this backup later.
When you are ready, click on the Backup green button to start the backup procedure.
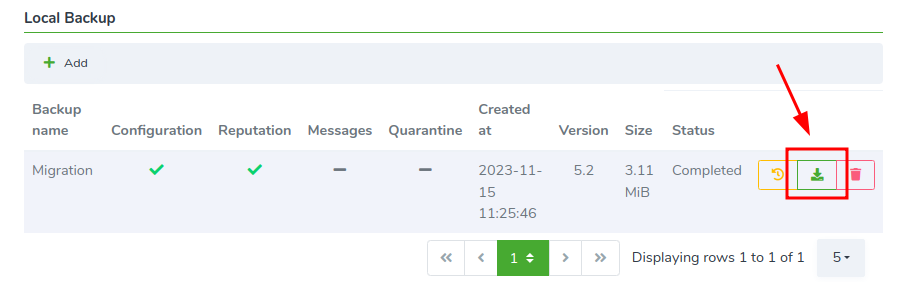
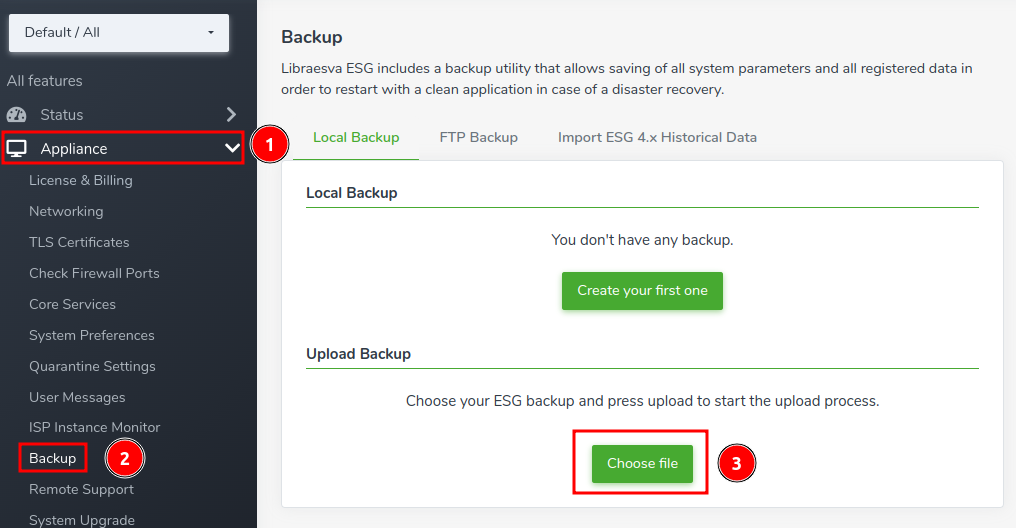
 When the backup is completed, download it clicking on the green download button as shown in the screenshot below.
Note: the backup extension must be .tar.gz, some browsers changes the extension, so please check it.
When the backup is completed, download it clicking on the green download button as shown in the screenshot below.
Note: the backup extension must be .tar.gz, some browsers changes the extension, so please check it.
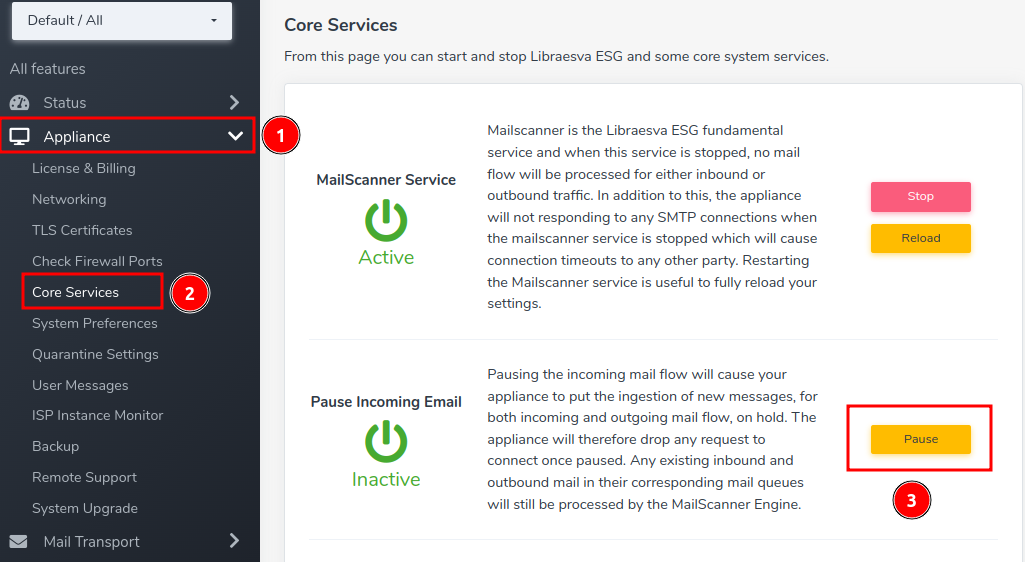
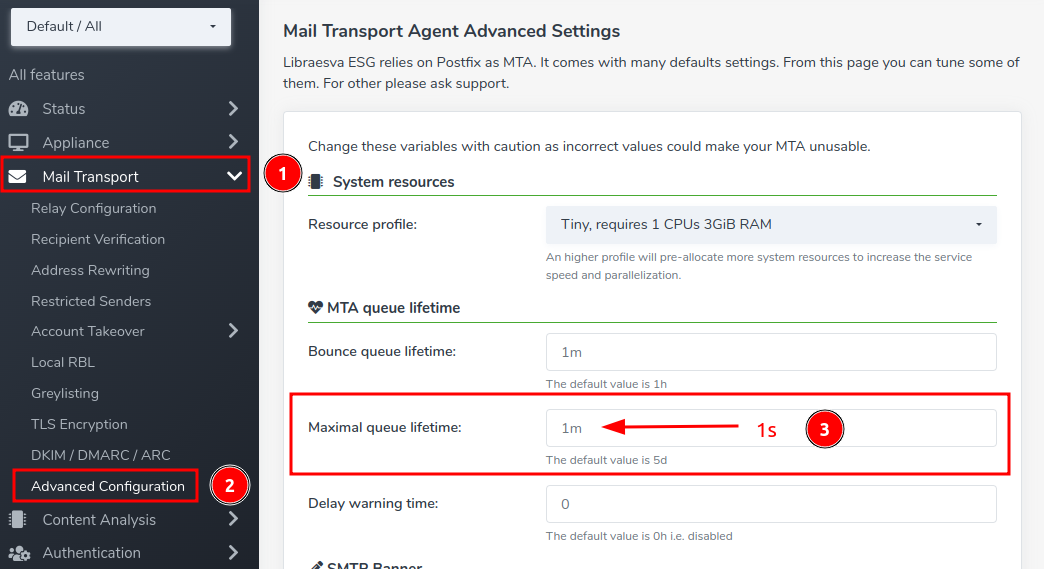 You are ready to emptying out the outgoing queue. To perform this operation, please reach the Mail Queues page, move on the Outgoing Queue tab and click on the Retry all button every 10 seconds. By refreshing the page you should see the queue slowly emptying out.
Keep clicking the Retry all button and refreshing the page every 10 seconds until no more email in the queue.
You are ready to emptying out the outgoing queue. To perform this operation, please reach the Mail Queues page, move on the Outgoing Queue tab and click on the Retry all button every 10 seconds. By refreshing the page you should see the queue slowly emptying out.
Keep clicking the Retry all button and refreshing the page every 10 seconds until no more email in the queue.
Prerequisites
Before performing the appliance migration, please perform the below adjustments in order to avoid email loss or heavy disservices.Setting up the PTR record
The PTR record is essential to perform the reverse DNS (rDNS) check on the IP address of the delivering mail server. You must to set the PTR record of the IP address the new appliance will have, pointing to the appliance hostname. Note: if your installation is a Libraesva Cloud appliance, the PTR record creation is completely managed by the Libraesva operation team, so you don't have to create any PTR record.Updating the SPF record
The SPF record is a TXT DNS record that defines the hosts IP addresses that are allowed to send email on behalf of your domain. You need to update it with the new appliance IP address in order to avoid receiving mail servers rejecting the email coming from the new installation. The SPF record must be updated for every domains that sends emails through ESG. Note: if your installation is a Libraesva Cloud appliance and your domain has theinclude:spf.esvacloud.com directive in your SPF record, you don't have to update it.