To migrate an ESG 4.9 appliance to version 5.x we have to deploy a new Virtual Machine and then migrate the configuration and history data. Only for this time, upgrade scripts aren’t supported.
At the end of this guide, you’ll have a new ESG 5.x appliance with the same IP address as the old ESG 4.x, so that no external change is required, especially firewall and routing settings.
It’s very important to follow all the steps in the order that are listed here, to make sure that all the information is correctly replicated.
To make this guide as simple as possible we assume the below configuration:
- ESG 4.9.x IP address -> 192.168.0.4
- ESG 5.x IP address -> 192.168.0.5
Note: we estimate a downtime of a few minutes during the mail flow switch.
Prerequisites
Before starting the migration process, please satisfy all the below requirements.
Breaking changes
The new version of the ESG includes a lot of improvements and bug fixes, but involves some breaking changes
you have to take note of.
Before performing the migration you must read
all the available Release Notes for the 5.x version starting from the
ESG 5.0 Release Notes page.
If any breaking change could affects your email infrastructure, please contact our support.
License
The version 5.x of the ESG requires a different license. The version 4 licenses are NOT compatible with the new version.
You must request your Libraesva ESG 5.x new license file by sending an email to licensing@libracyber.com.
Firewall
Configure your firewall following the Firewall Ports Requirements knowledge base.
Migration
Below are the steps to safely complete the migrations.
Create the new instance
First of all you need to download the Libraesva ESG 5.3 image from the
Download page and import it in your hypervisor, without completing the wizard.
Note: version 5.3 is the latest version published that permits the upgrade from 4.9
Obtain the migration file
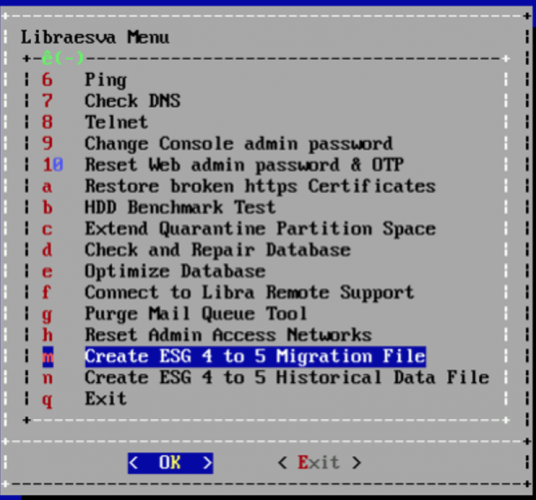
Login as admin from the hypervisor, or via SSH, to your Libraesva ESG 4.9 installation console and select the “m” option from the menu as displayed below.
Follow the procedure and create the migration file.
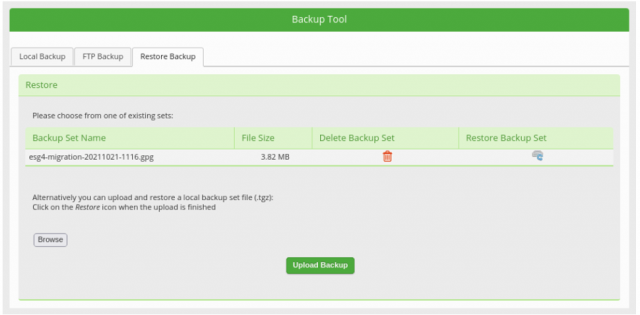
 Login to your Libraesva ESG 4.9 installation web UI and download the backup from the System -> Appliance -> Backup Tool -> Restore Backup page.
Note: to download the backup file you have to click on its name in the table.
Login to your Libraesva ESG 4.9 installation web UI and download the backup from the System -> Appliance -> Backup Tool -> Restore Backup page.
Note: to download the backup file you have to click on its name in the table.
Destroy the cluster
Note: this step is optional, if your is not a cluster installation, you can skip this section.
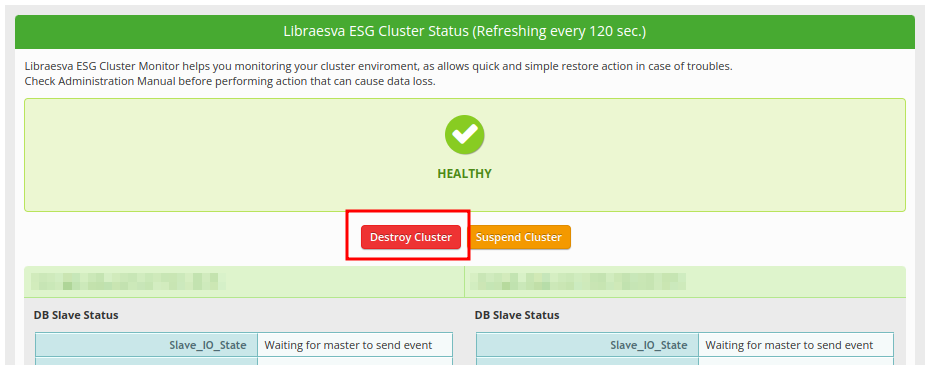
From the first node of your installation, reach the
System -> High Availability -> Cluster Monitor page and click on the
Destroy Cluster red button.
When the cluster has been destroyed, you can safely
power off the secondary node from the hypervisor.
Wizard
Run the wizard opening the just deployed ESG 5.x appliance.
Temporary IP address
Into the third step, named
Networking, assign a temporary IP address (i.e. 192.168.0.5)
Restore configuration
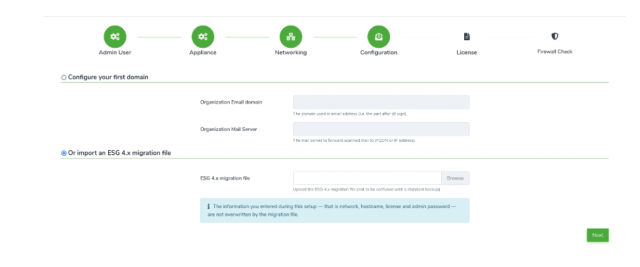
Into the fourth step, named
Configuration, select “Or import an ESG 4.x migration file” option and upload the migration file previously downloaded from the ESG 4.x appliance.
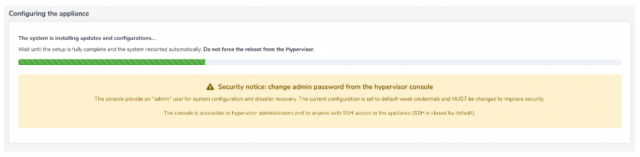
Complete the wizard and wait until all the setup is finished.
Check migrated settings
Now your Libraesva ESG 5.x installation is configured and ready for production. All settings should be migrated, so different behaviors shouldn’t happen, but is recommended to give a check.
Stop the incoming email flow
This operation is done to be sure no email are lost during the migration.
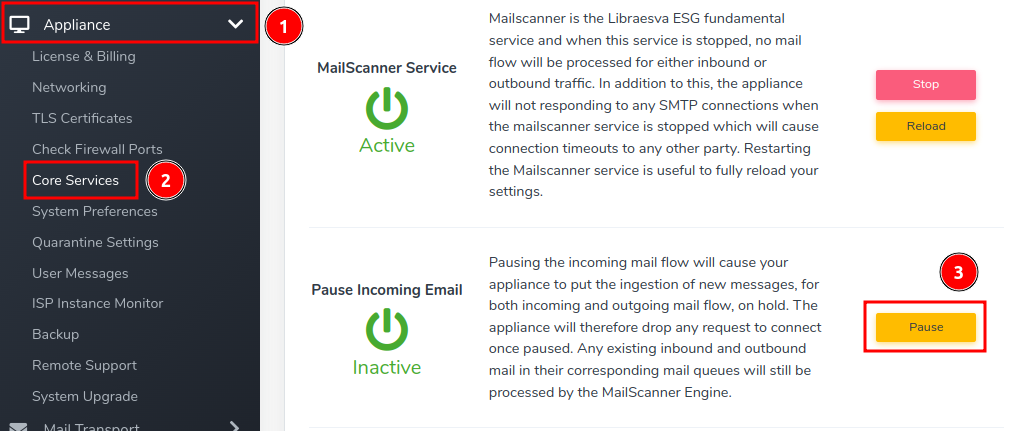
To stop the incoming email flow click the
Pause button in the
Appliance -> Core Services page.
Empty out the queues
Log into your Libraesva ESG 4.9 appliance and reach the System > Appliance > Core Services page. Click on the Pause Incoming Mail button.
This will stop mail flow into the appliance to flush all mail queued.
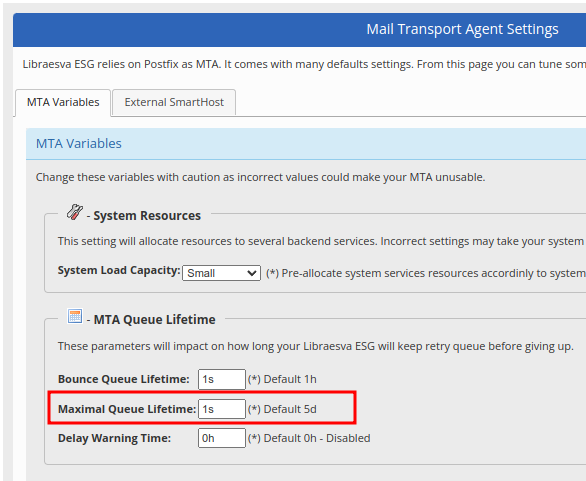
Reach the
System -> Mail Transport -> MTA Advanced Configuration page and set the
Maximal Queue Lifetime parameter to 1s (1 second) as represented in the screenshot below.
Scroll down the page and click on the
Save button.
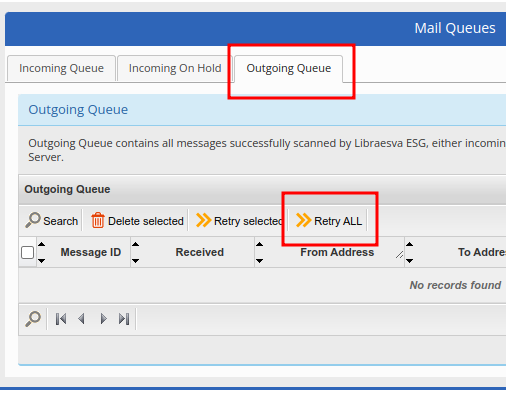
Reach the
System -> Mail Transport -> Mail Queues ->
Outgoing Queue and click on the
Retry ALL button until the queue is empty.
Switch the flow
This is a crucial step of the migration process, please be careful.
IP address switch
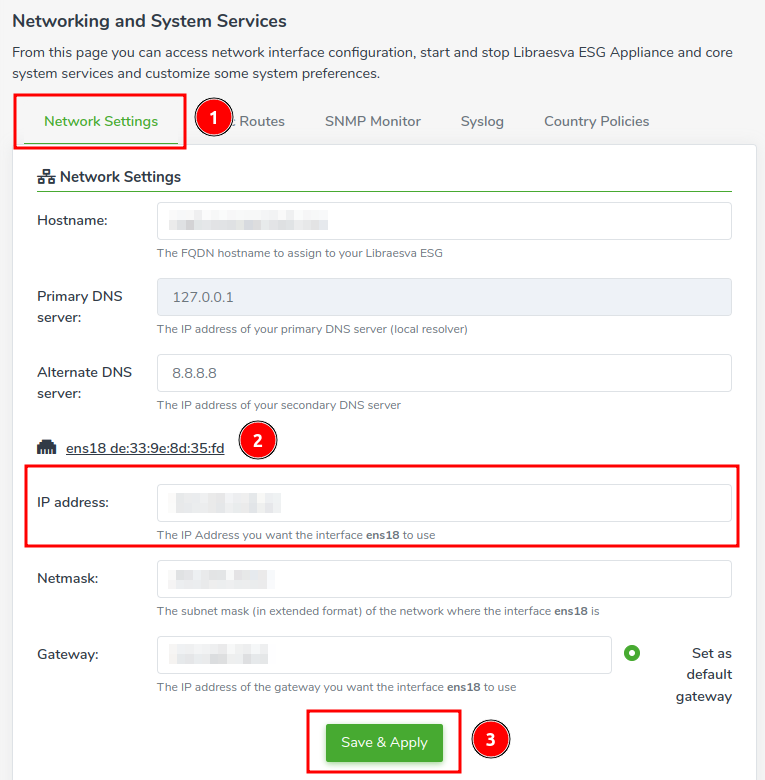
From the ESG 4.9 appliance web UI, go to System -> Appliance -> Networking -> Network Settings and assign a new temporary IP address in order to free out the production IP address that will be assigned to the ESG 5.x appliance.
Log into your Libraesva ESG 5.x appliance, move to Appliance > Networking > Network Settings and change the temporary IP address to the production one.
Click on the Save & Apply button.
TLS Certificates
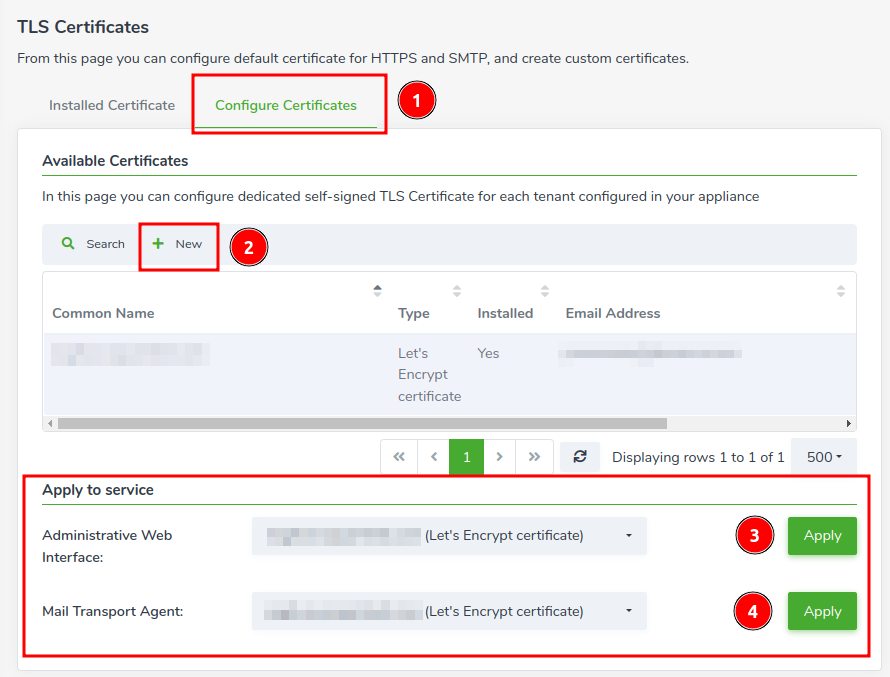
Create or upload a TLS certificate from the
TLS Certificates page and apply it to
both MTA and web UI as shown below.
When both TLS certificates are applied, please open a
new tab in your browser and reach the appliance hostname, you should see the browser is connected via
HTTPS to the web UI (the lock beside the URI should no longer be red).
Email flow resuming
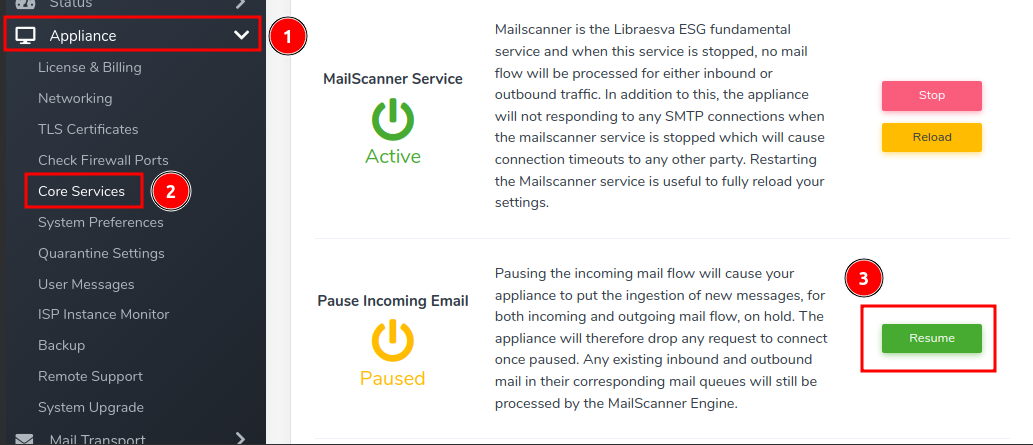
Reach the Appliance -> Core Services page and click the Resume button in the Pause Incoming Email section.
Cluster Wizard
Note: this step is optional, if yours is not a cluster installation, you can skip this section.
Create the secondary node
The node must have the same hostname as the secondary node of the 4.9 installation.
Run its wizard
All the settings in this wizard will be
overwritten during the cluster setup, so you can set
dummy data for each setting.
Note: the IP address of the secondary node must be a temporary IP address.
In the Configuration step of the wizard do not restore the migration
file, type example.com as Organization Email Domain and type 127.0.0.1 as Organization Email Server.
Prevent rejecting emails
Since the node is not yet configured, you must stop the email flow in order to avoid email rejecting.
To stop the incoming email flow click the
Pause button in the
Appliance -> Core Services page.
Network configuration
From the secondary node web UI, move to Appliance > Networking > Network Settings and change the secondary node temporary IP address to the production one.
Click on the Save & Apply button.
Cluster creation
To set up the cluster follow the
Cluster Wizard documentation page.
TLS Certificates
Create or upload a TLS certificate from the
TLS Certificates page of the secondary node and apply it to
both MTA and web UI as shown below.
Note: now you should see
two different certificates, one for the primary node and the other one for the secondary node.
When both TLS certificates are applied, please open a
new tab in your browser and reach the appliance hostname, you should see the browser is connected via
HTTPS to the web UI (the lock beside the URI should no longer be red).
Email flow resuming
Reach the Appliance -> Core Services page and click the Resume button in the Pause Incoming Email section.
Historical data restoring
First of all, be sure there’s no mail flow on the old Libraesva ESG 4.9, then you can proceed restoring the historical data on the new appliance(s).
Note: in cluster scenarios, you must perform this operation only to one of the two nodes, as data is replicated between nodes.
Backup creation
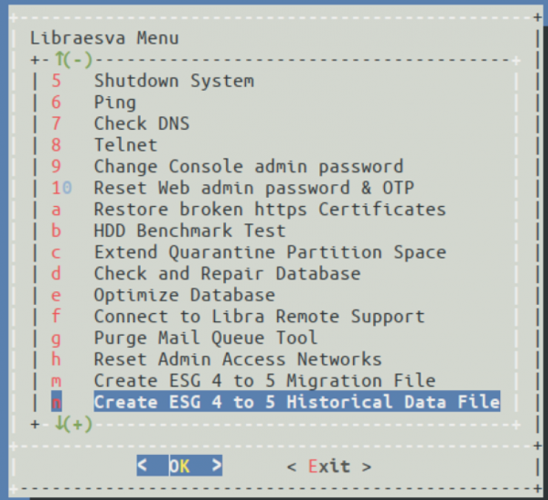
Login as admin from the hypervisor to your Libraesva ESG 4.9 installation console and select the “n” option in the menu: Create ESG 4 to 5 Historical Data File.
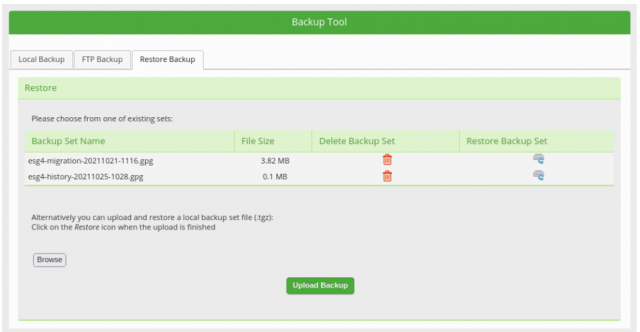
 Login to your Libraesva ESG 4.9 installation from the web UI (via its IP address) and download the backup from the System > Appliance > Backup Tool > Restore Backup page.
Note: to download the backup file you have to click on its name in the table.
Login to your Libraesva ESG 4.9 installation from the web UI (via its IP address) and download the backup from the System > Appliance > Backup Tool > Restore Backup page.
Note: to download the backup file you have to click on its name in the table.
Backup restoring
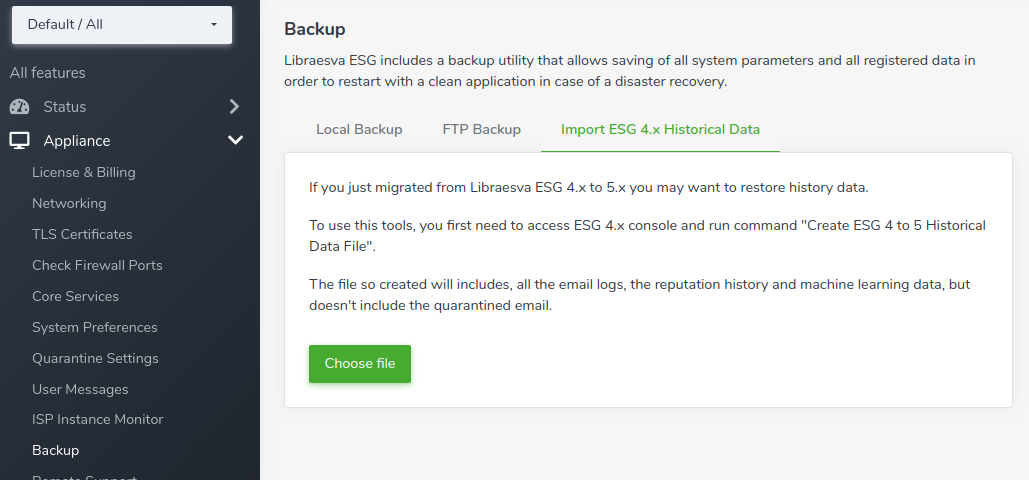
From the Libraesva ESG 5.x reach the Appliance -> Backup -> Import ESG 4.x Historical Data.
Click on the Choose file button and select the esg4-history-<hostname-and-numbers>.gpg file from your PC.
Note: the restoring job will run in the background and may take several hours to complete.
Warning:
do not upload multiple times the same historical data file as it causes the sum of reputation data.
Restore the quarantine
You can also restore quarantined messages from the old 4.9 appliance to the new installation.
The old ESG 4.9 must be up and running and must have an IP address assigned.
Note: in cluster scenarios, you must perform this operation only to one of the two nodes, as data is replicated between nodes.
Login as admin from the hypervisor to your Libraesva ESG 4.9 console and select the “o” option in the menu: Allow ESG 5 connection for quarantine transfer.
Enter the new ESG 5.x IP address, and note the given password.
Login as admin from the hypervisor to your Libraesva ESG 5.x console and select the “p” option in the menu: Transfer quarantine from ESG 4.x appliance.
Enter ESG 4.9 IP and paste the noted password.
The
rsync procedure will start, synchronizing the quarantine from the 4.9 appliance to the new 5.x installation.